
The calendar screen explained
Before booking anything, learn the parts of the screen.
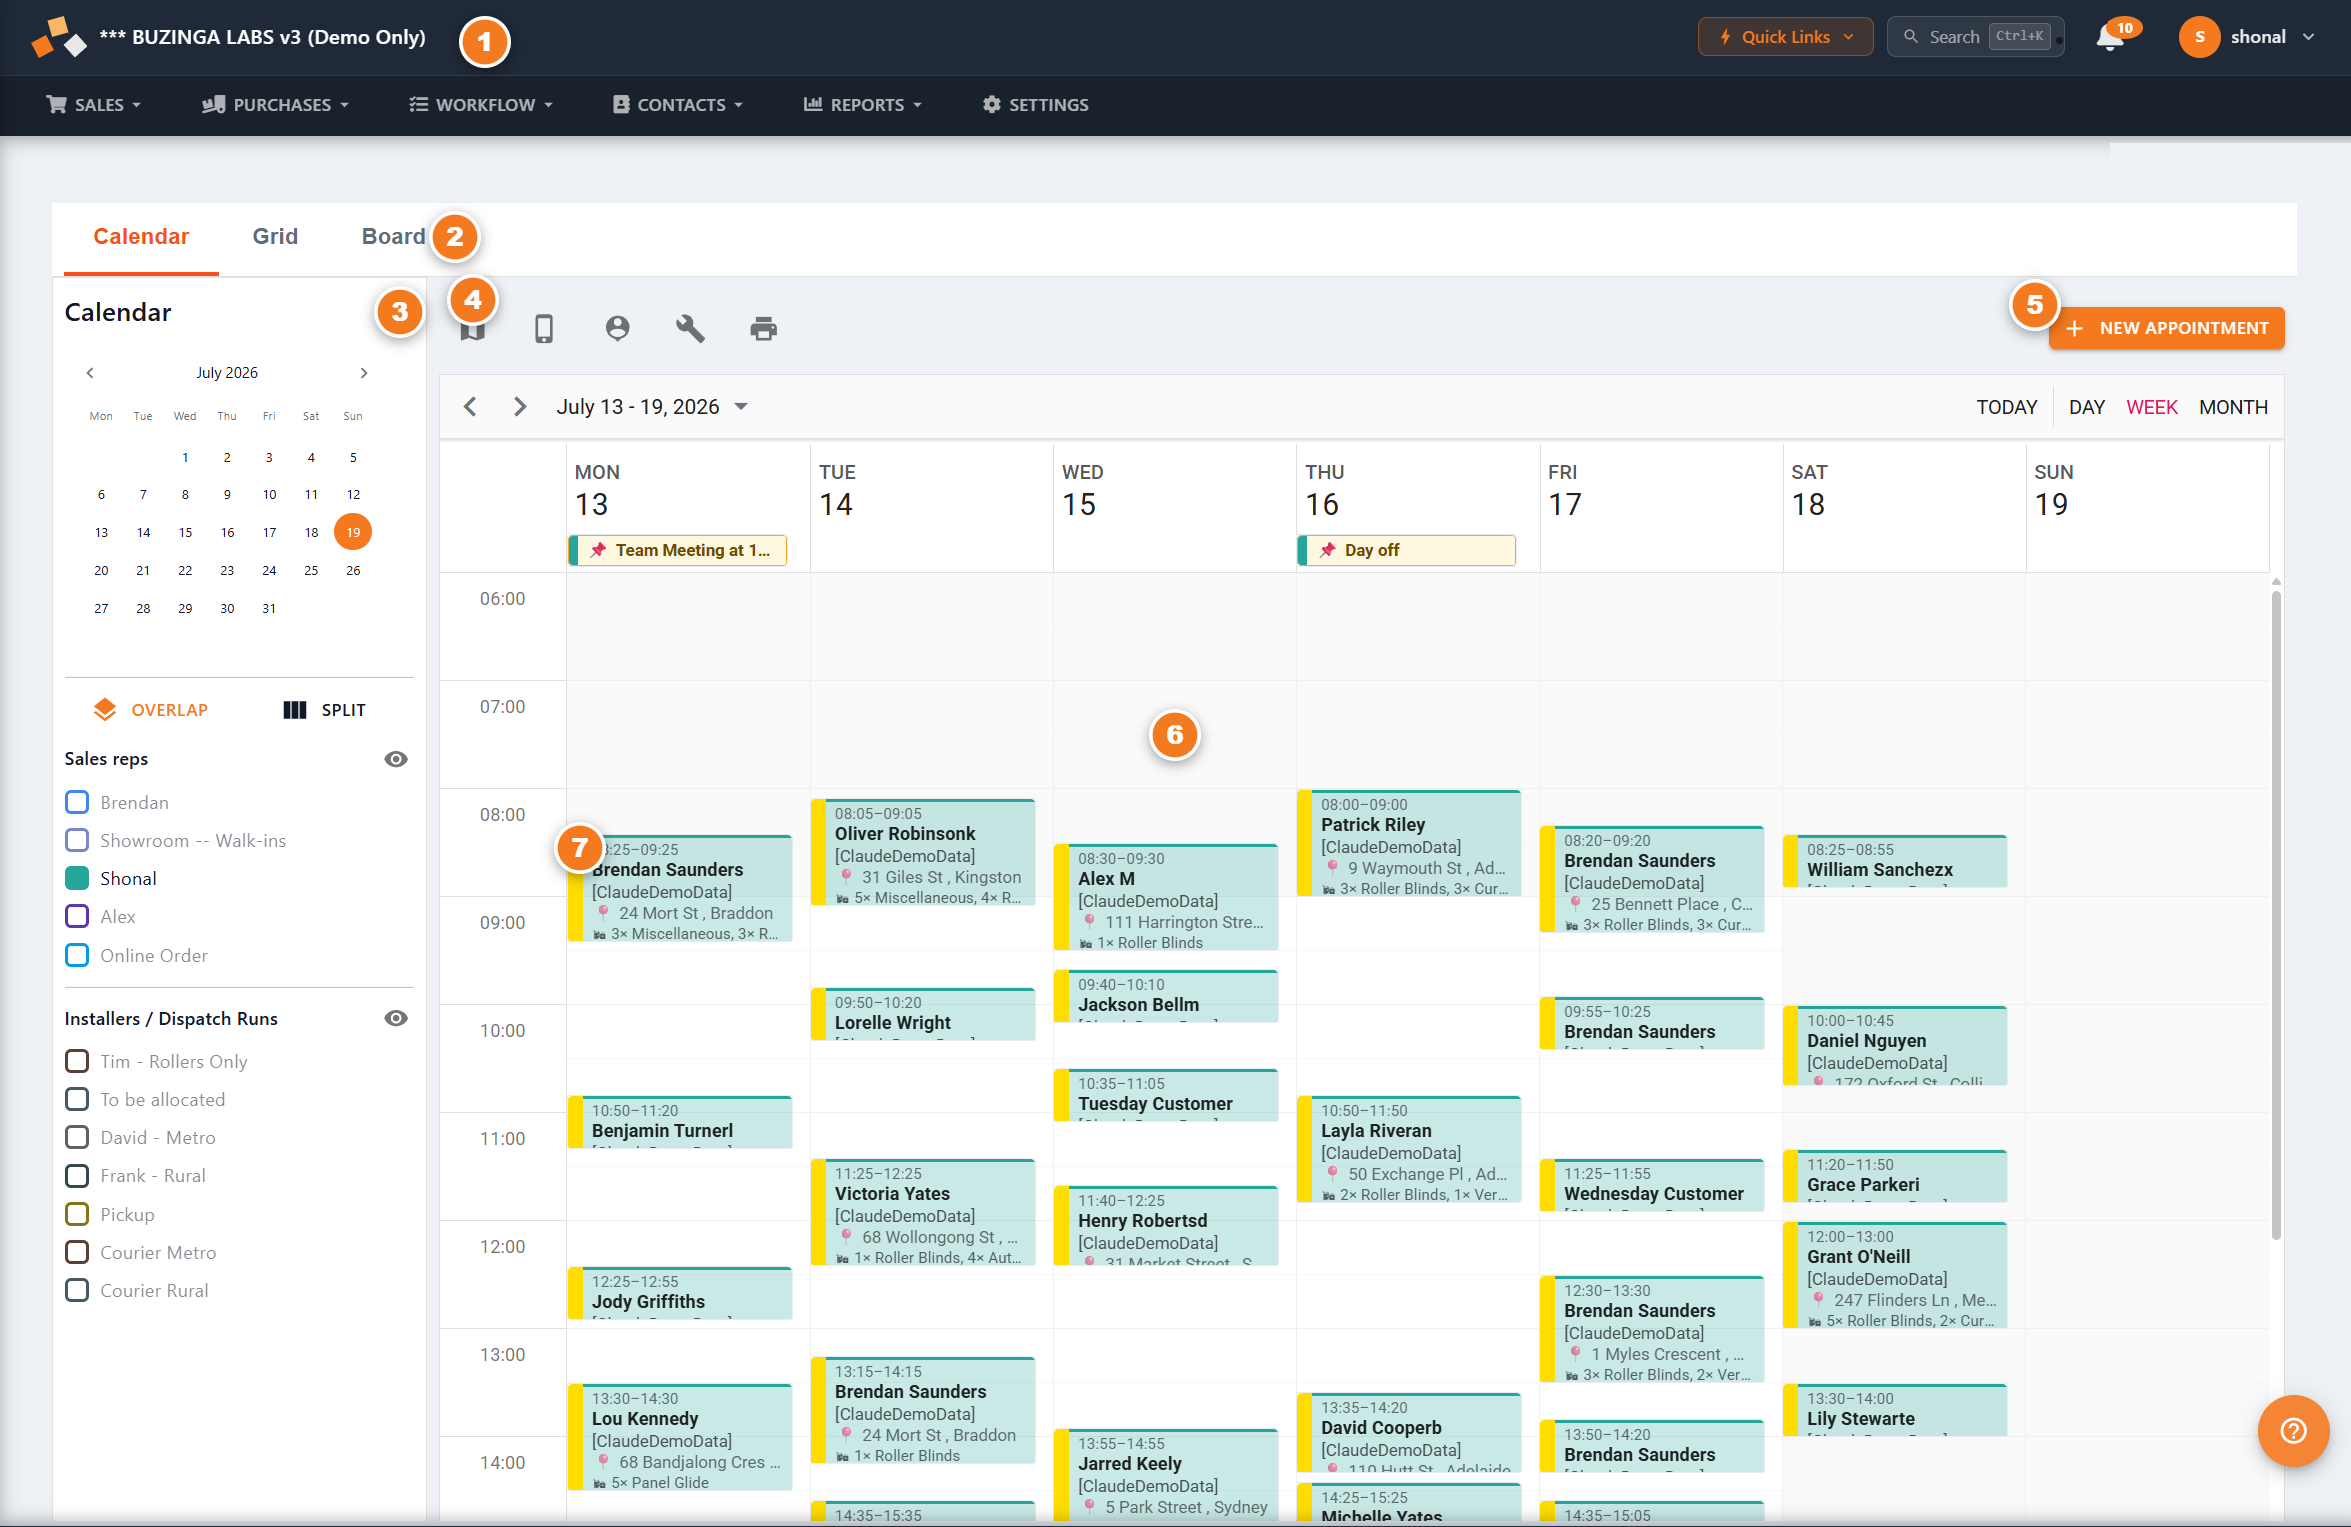
Figure 1 — the weekly calendar. The picture was taken before the Follow-ups bar (item 8) was added, so it isn’t shown here.
- Top bar & menu. The logo, plus Quick Links, Search, notifications and your account. The dark menu below it (Sales, Purchases, Workflow, Contacts, Reports, Settings) moves you around BUZ.
- View switch. Three ways to look at the same appointments: Calendar, Grid (a list) and Board. You’ll almost always use Calendar.
- Side panel (the “rail”). A little month to jump dates, and tick-boxes to show or hide each sales rep and installer.
- Toolbar. Small round buttons: Map, My Day, private appointments, and Print.
- New Appointment button. The orange button you press to start booking a customer.
- The week grid. Days run across the top, times down the side. Each coloured block is one booked appointment.
- An appointment block. Each coloured block is one booked appointment — the left stripe shows its status, the fill shows the rep.
- Follow-ups bar. A slim bar between the view switch and the calendar showing the follow-ups you logged that are due in the next two weeks, with a count and how many are overdue. It starts closed — select it to open — and it’s hidden altogether when nothing is due. See Follow-ups & tasks.