
Book an appointment
This is the most important task. Follow it slowly the first few times — after that it becomes second nature.
Part A — Open the booking form
Section titled “Part A — Open the booking form”- Click the orange New Appointment button at the top-right of the calendar. A form slides in from the right — this is where you enter the customer’s details.
- Or click straight onto the calendar. If you know the day and time, click that empty spot in the grid. A red dashed “ghost” block appears and the form opens with the day, time and rep already filled in.
Part B — Fill in the form
Section titled “Part B — Fill in the form”The form is split into numbered blocks. Work top to bottom.
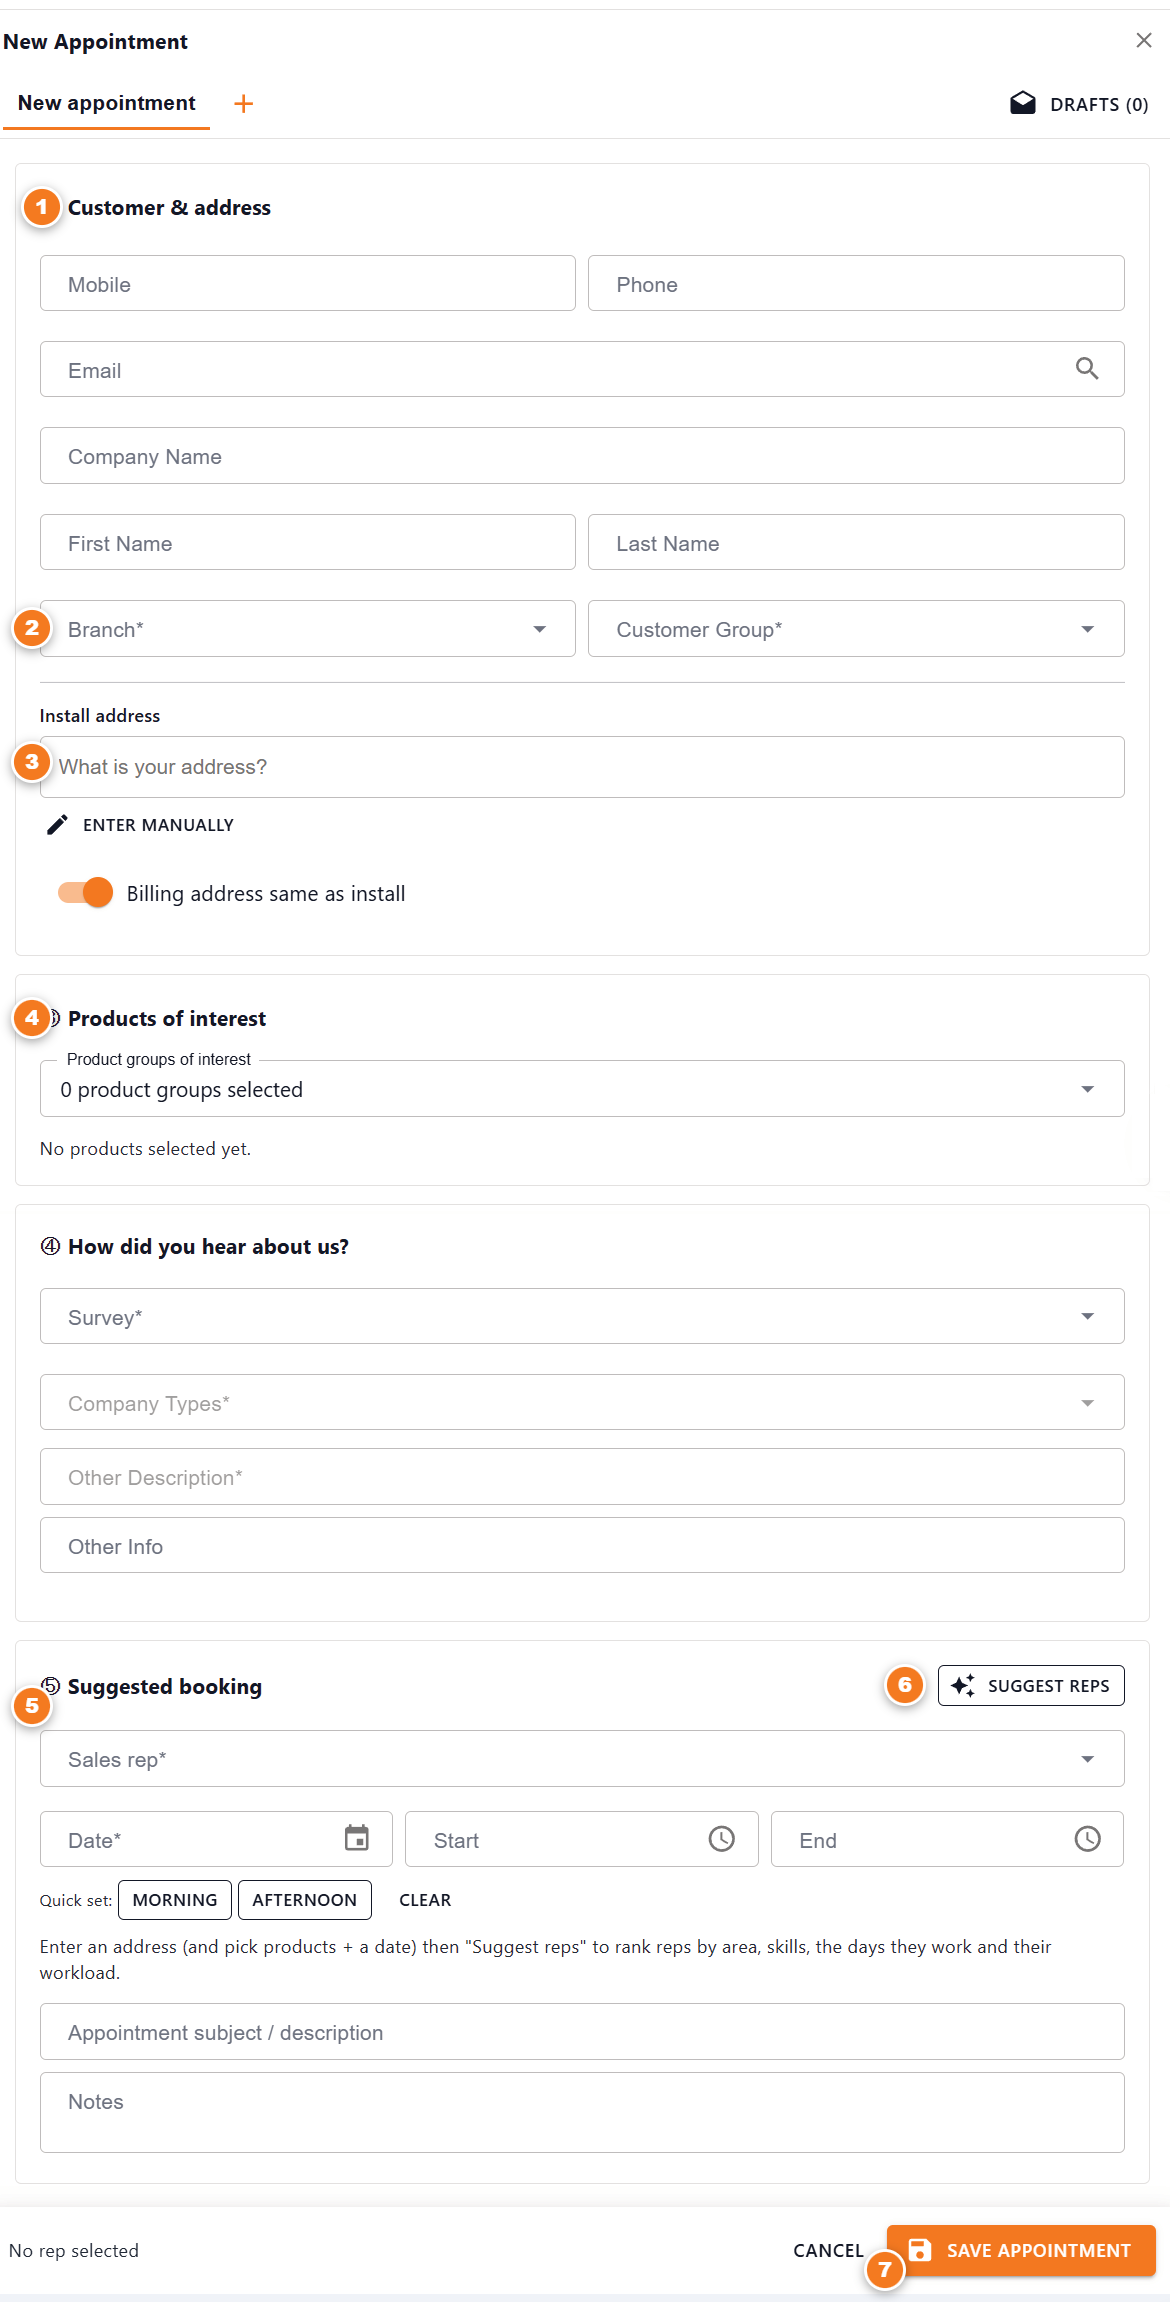
Figure 1 — the New Appointment form.
- Customer & address. Who the appointment is for. Start with the mobile number — BUZ checks if they’re already a customer.
- Branch & Customer Group. Two boxes you must fill in (marked with a red ✱). Pick each from its list.
- Install address. Type the first line and pick the real address from the drop-down. This helps BUZ suggest the nearest rep.
- Products of interest. Tick what the customer wants, then type how many of each.
- Suggested booking. Pick the rep, the date and the time. Rep and date are required.
- Suggest reps button. Click it and BUZ ranks reps by area, skills and workload — then pick the rep it suggests.
- Save bar. The orange Save Appointment button. Nothing is booked until you press it.
Part C — Save it
Section titled “Part C — Save it”- Check the required boxes are filled — a name, Branch, Customer Group, a Sales rep and a Date.
- Press Save Appointment. A green message says “Appointment #123 created.” It now shows on the calendar and in that rep’s My Day.
- Book another, or close. Click Start another appointment in the green message, or press the ✕ at the top of the form.