
Settings Home & setup checklist
1. Tell BUZ what kind of business you are
Section titled “1. Tell BUZ what kind of business you are”Right at the top, you’ll pick your business type. There are three cards — choose at least one, and pick more than one if they apply:
- Retail — you sell and install direct to consumers.
- Wholesale — you supply other businesses.
- Manufacturing — you make the product yourself.
Your choice tailors the checklist below — you only see setup steps that apply to you, so a pure retailer is never shown manufacturing steps. It saves automatically the moment you click: there’s no Save button.
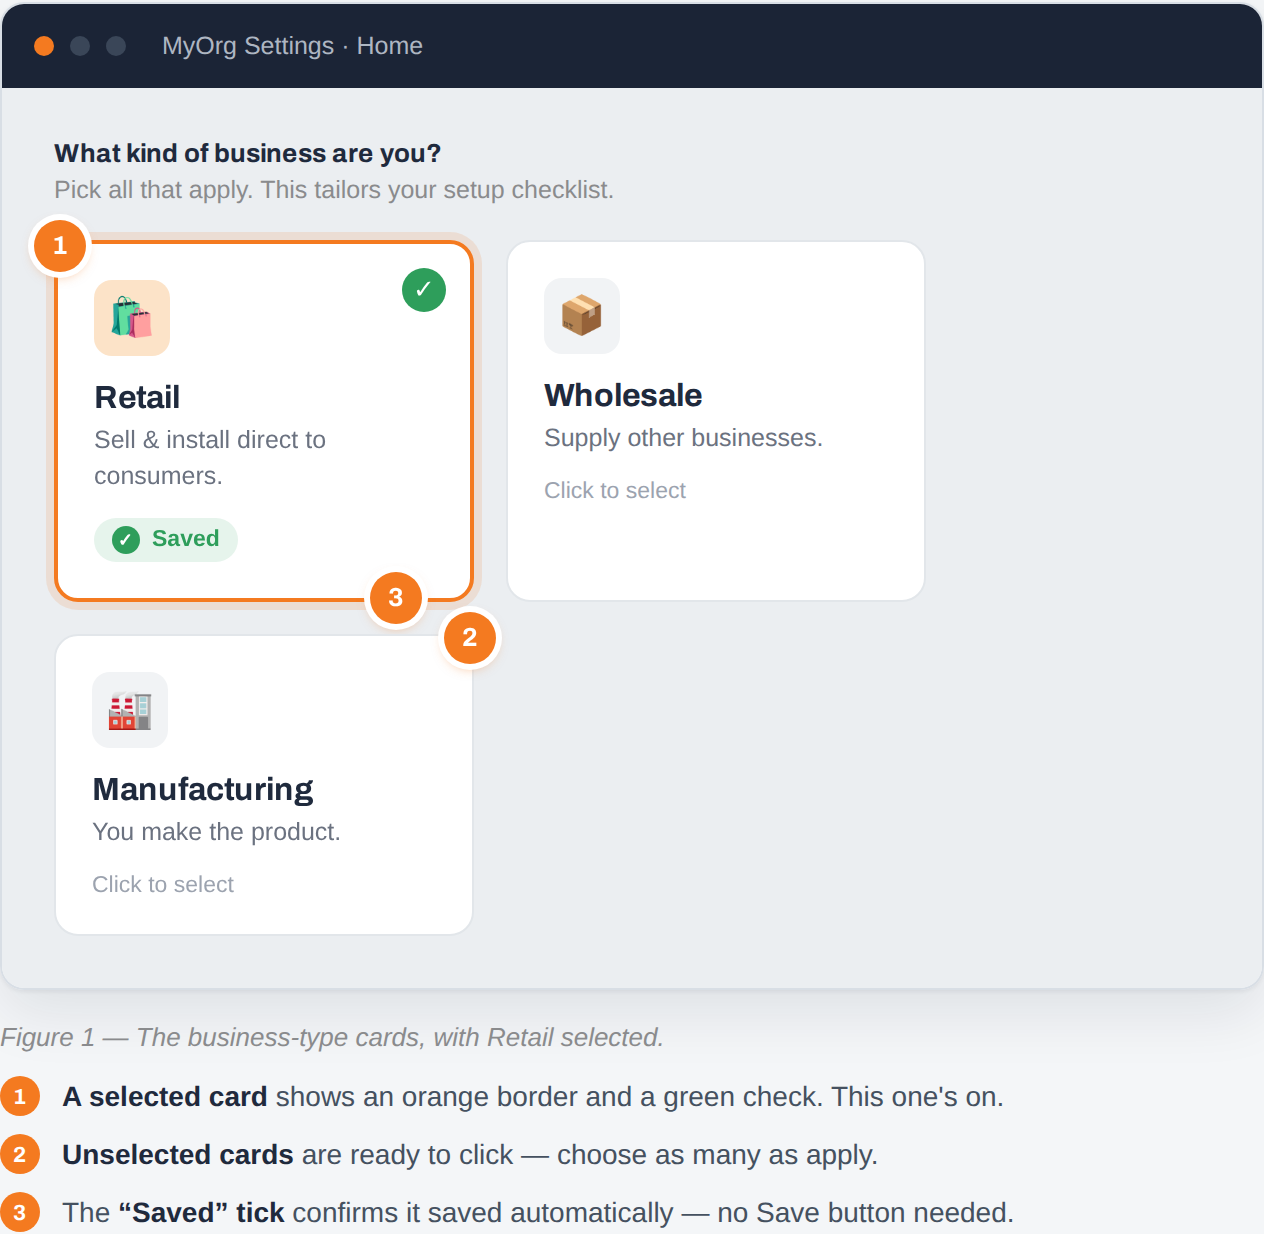
Figure 1 — the business-type cards. A selected card shows an orange border and a green check; the “Saved” tick confirms it saved automatically.
2. Read your snapshot tiles
Section titled “2. Read your snapshot tiles”Across the top of Settings Home is a row of tiles giving you an at-a-glance snapshot of your account:
- Users — how many of your licensed seats are active.
- Activity — sign-ins in the last 30 days.
- Orders this month — your running order count.
- Integrations — whether Xero or MYOB is connected.
- Subscription — your plan, with a link to Account & Usage.
These are informational — click any tile to jump straight to the related area.
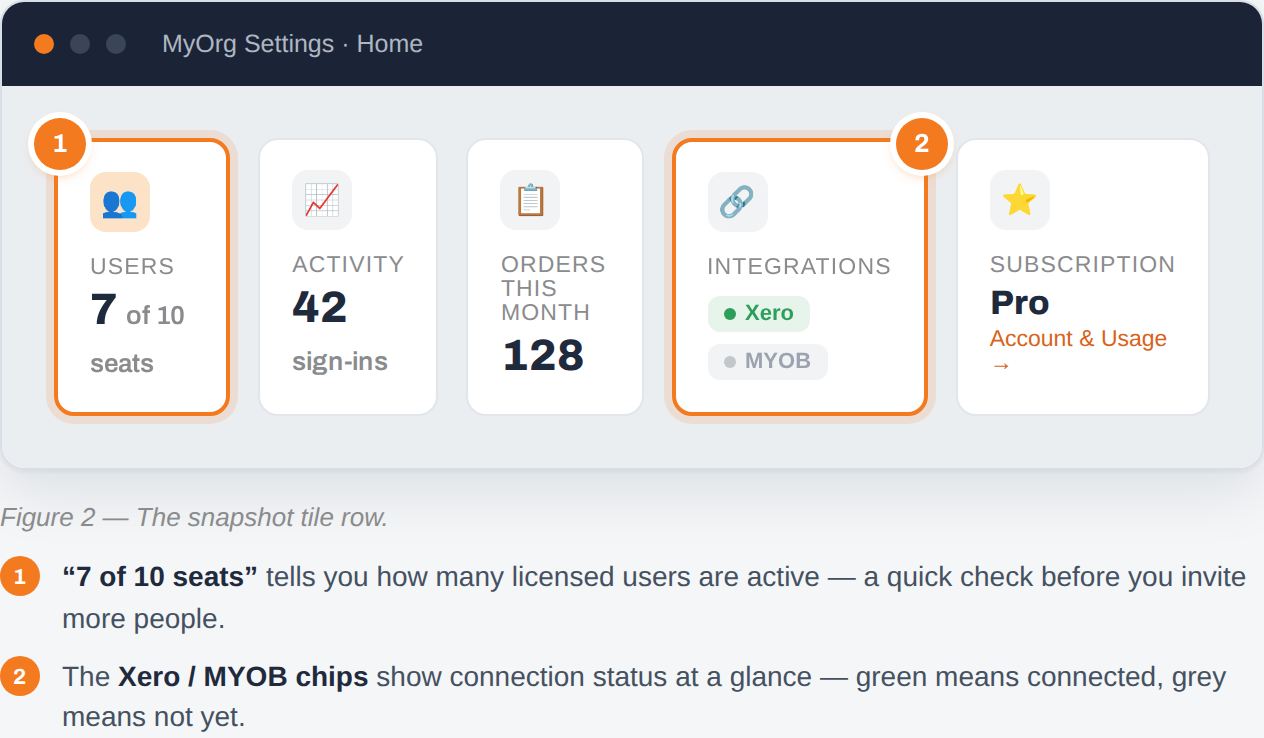
Figure 2 — the snapshot tiles. “7 of 10 seats” shows active licences; the Xero / MYOB chips show connection status at a glance.
3. Work through your setup checklist
Section titled “3. Work through your setup checklist”This is the heart of the page. The checklist walks you through everything worth setting up, in a sensible order.
- A progress bar at the top (“14 of 27 done”) tracks how far you’ve come. Finish everything and a “Setup complete 🎉” banner appears.
- Tasks are grouped into modules — Organisation details, Leads, Customers, Quoting & Ordering, Templates, Invoicing & Banking, and so on — shown as expandable groups. The first unfinished group opens by default.
- Each task row has a status you can set, an assignee, a “Do it now” button, and a help panel.
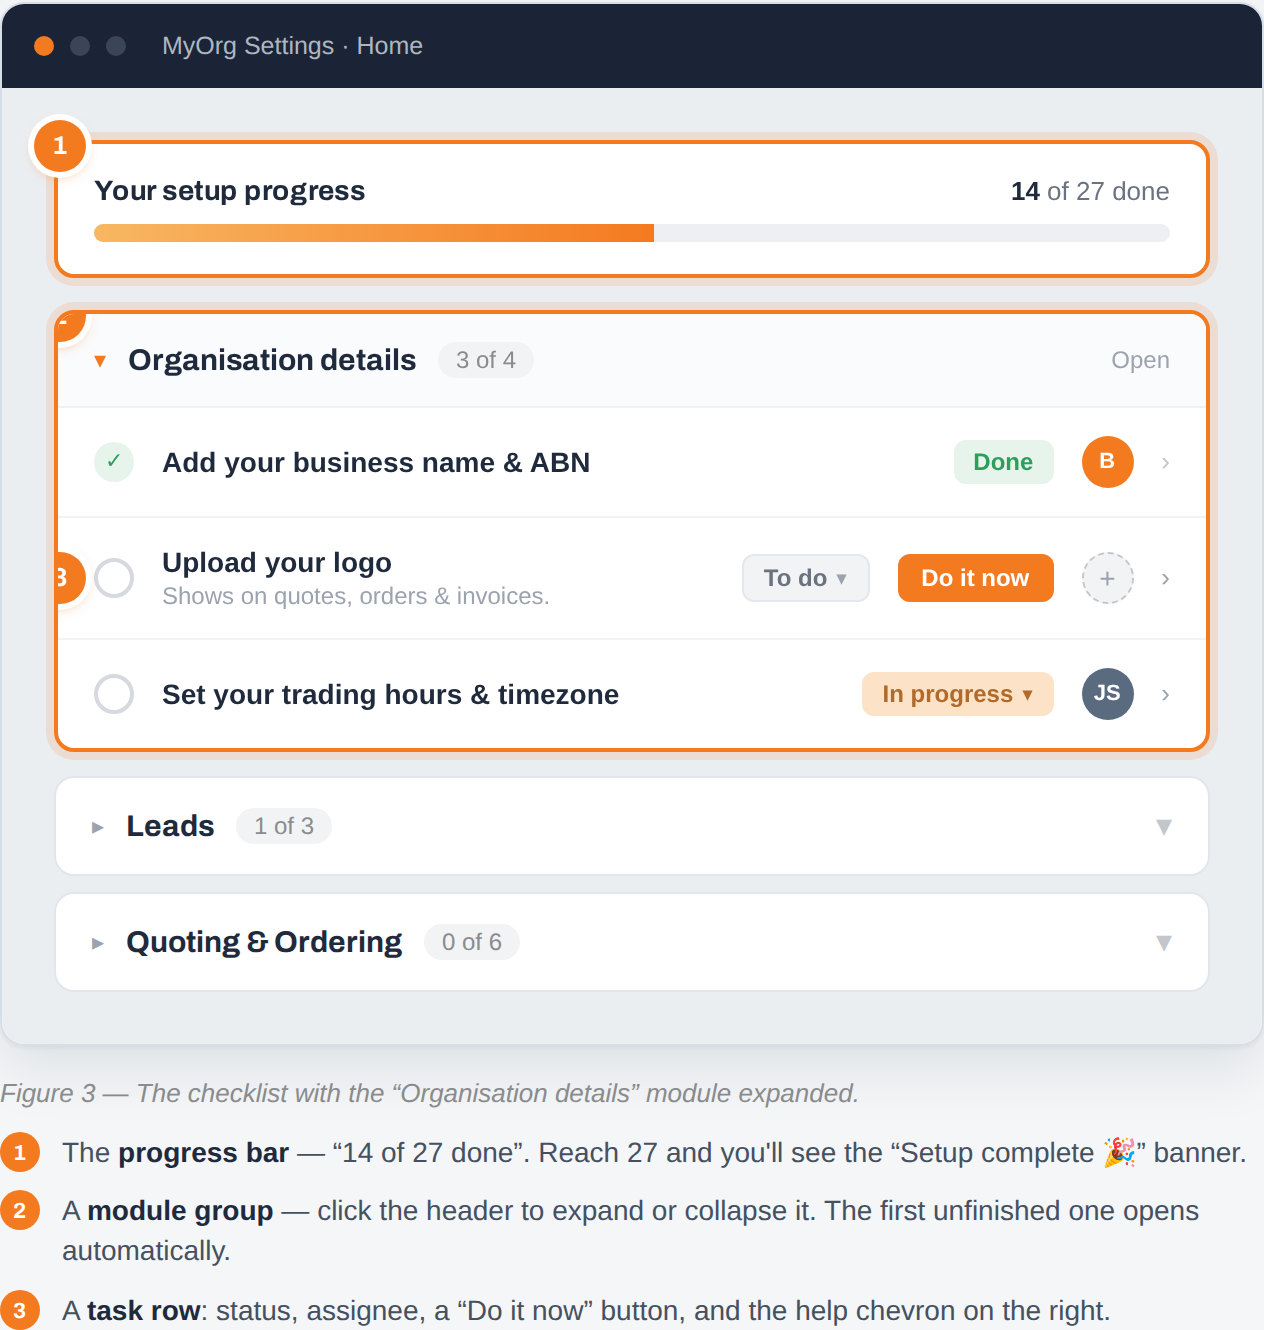
Figure 3 — the checklist with a module expanded: progress bar, module groups, and a task row (status, assignee, “Do it now”, help chevron).
Task statuses
Section titled “Task statuses”Set a status on any task to track where it’s at. There are five:
- To do — not started (the default).
- In progress — you’ve begun.
- Testing — done, but you’re checking it works.
- Done — complete.
- Not required — doesn’t apply; hides it from your progress count.
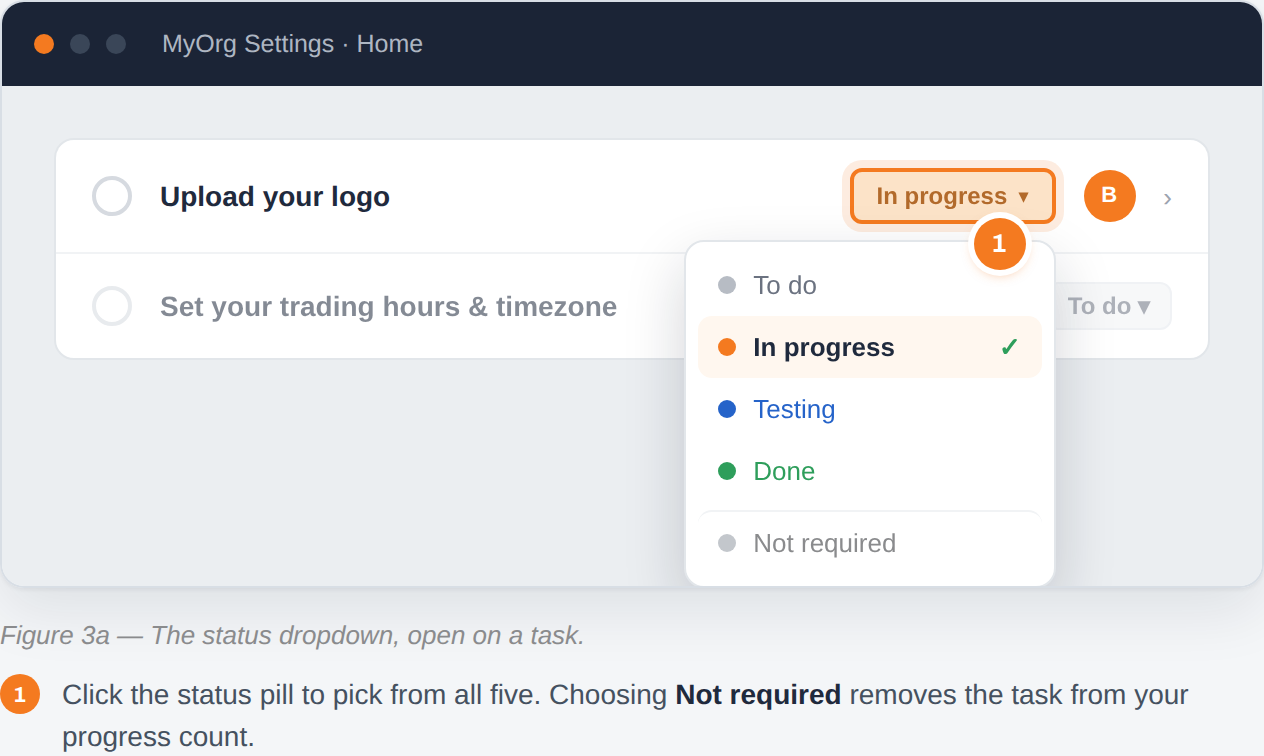
Figure 3a — the status dropdown. Choosing “Not required” removes the task from your progress count.
Things that tick themselves
Section titled “Things that tick themselves”Some steps complete themselves. BUZ quietly watches your data and ticks steps off as you go — for example, once you’ve added sales reps, the “Add your sales reps” step marks itself done. You’re always in control: you can override any auto-tick manually if you want to redo or re-open a step.
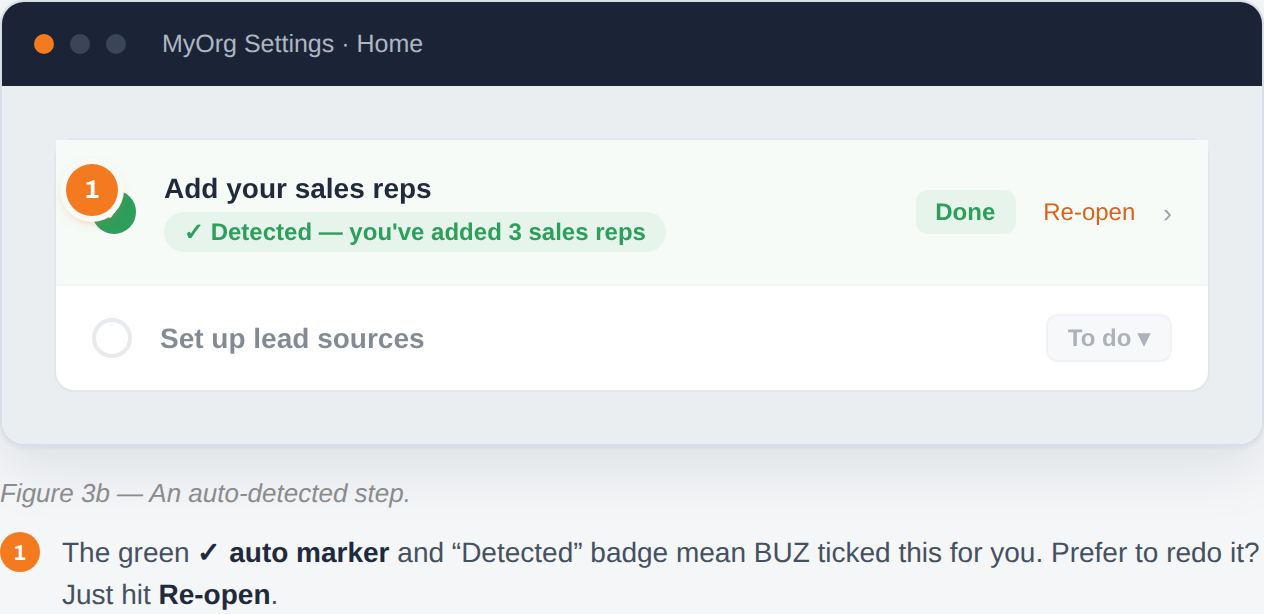
Figure 3b — an auto-detected step. The green ✓ and “Detected” badge mean BUZ ticked it for you; hit Re-open to redo it.
Assign tasks and leave notes
Section titled “Assign tasks and leave notes”Working with a team? Assign a task to one of your admins so everyone knows who’s doing what — their avatar shows on the row. And each row has a notes field for a quick reminder to yourself or a colleague.
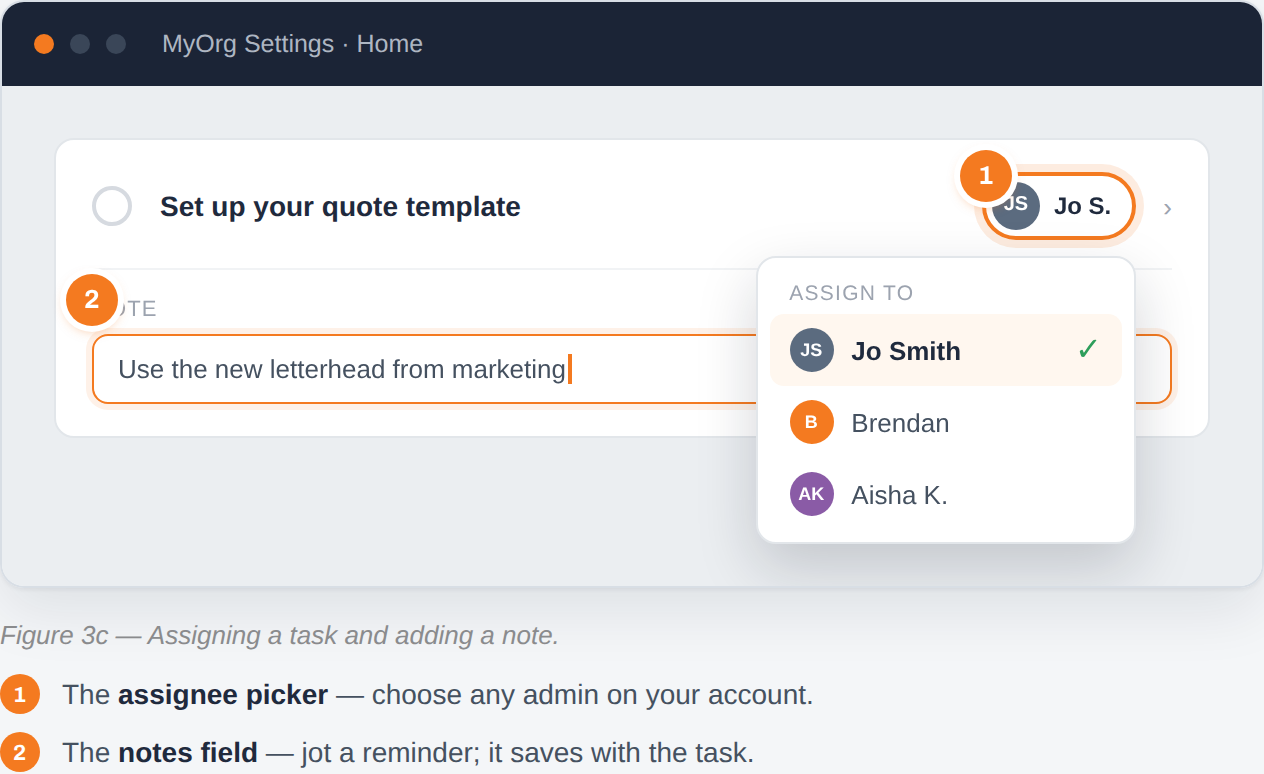
Figure 3c — the assignee picker (choose any admin) and the per-row notes field.
Get help on a step
Section titled “Get help on a step”Not sure what a step involves? Click the chevron on any row to open its help panel — it explains the step’s purpose, the details you’ll need, and shows a small example. Still stuck? The “Stuck? Get help” button flags the step to the BUZ support team.
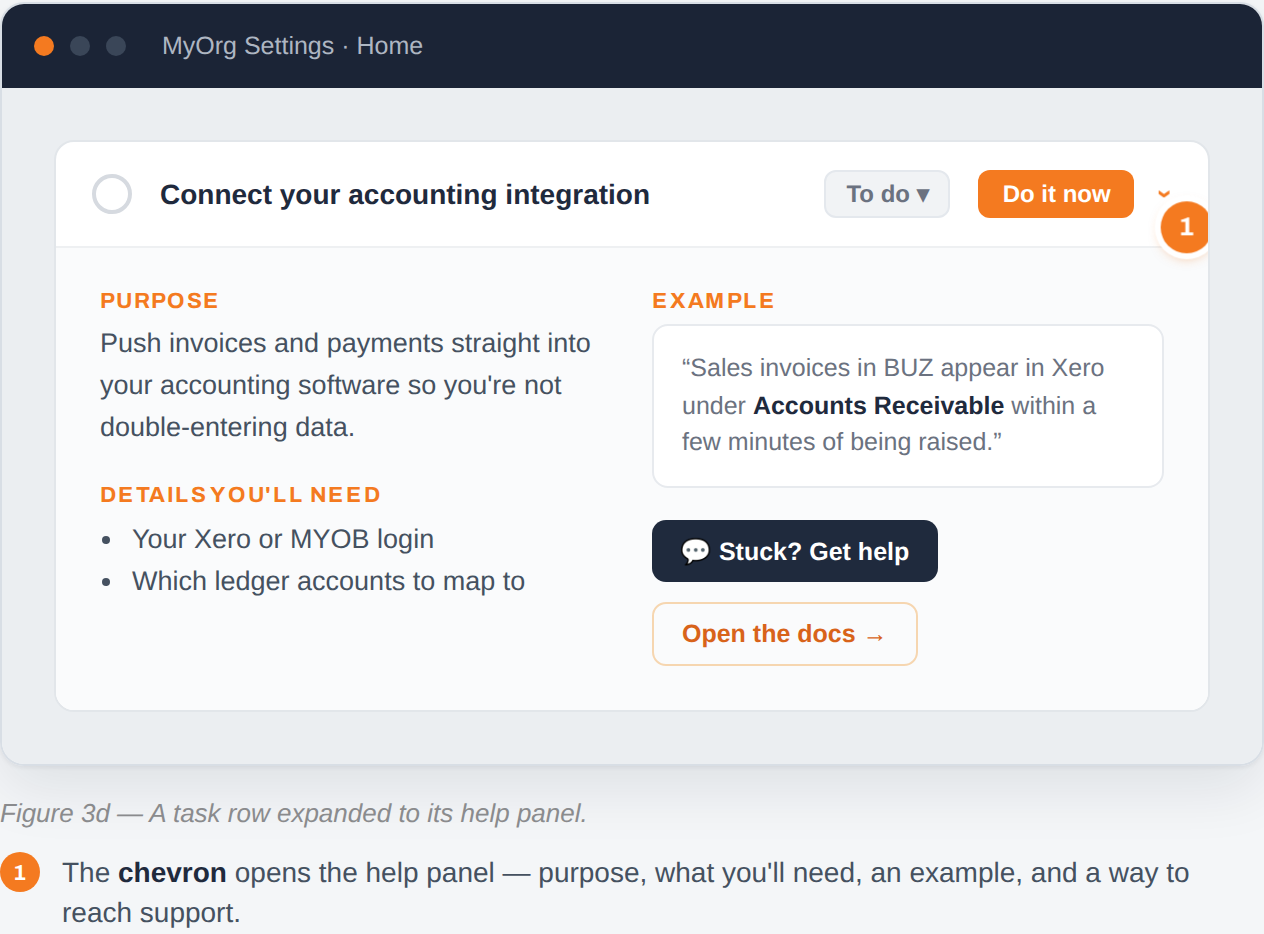
Figure 3d — a task row’s help panel: purpose, what you’ll need, an example, and a way to reach support.